Pseudo Tunnel
A demonstration of a UDP-in-UDP crafted packet from Node-B to the internal network of Node A (the 11.11.11.0/24 subnet).
- GitHub Link: https://github.com/packetcord/packetcord.io/tree/main/apps/l3_pseudo_tunnel
- Topology File: topology_examples/l3_pseudo_tunnel_example.json
Topology diagram

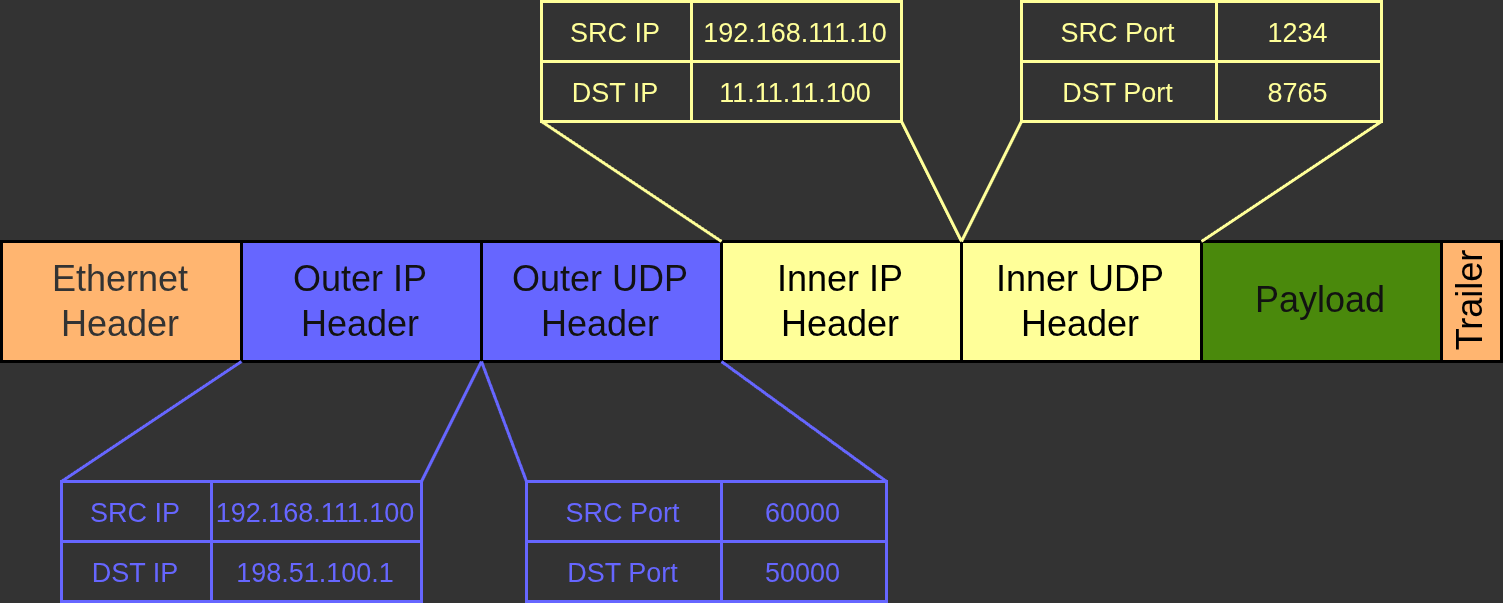
Encapsulation
Steps
Build the project (all examples)
cd packetcord.io
mkdir build
cd build
cmake .. --fresh
make
Start the topology
Load the exampe topology project file. Then Validate, Generate and Launch the topology.
Inside the shell of Node A
Run the following netcat command and leave the shell open:
nc -n -u -l -p 8765 -s 11.11.11.100 -v
Inside the shell of TEP
Run the following commands and leave the shell open:
cd /root
./l3_pseudo_tunnel_tep_app
The pseudo tunnel TEP should start with the following log:
[CordApp] Launching the PacketCord Pseudo Tunnel!
[CordL4UdpFlowPoint] Successfully bound to port 50000
Inside the shell of Node B
Run the following commands:
cd /root
./l3_pseudo_tunnel_client_app
And the log on the console should be:
[CordApp] Transmitting the crafted pseudo-tunnel packet...
[CordApp] Destroying all objects!
Result
Open the tab with with the Node A shell. You should see the following:
# nc -n -u -l -p 8765 -s 11.11.11.100 -v
Bound on 11.11.11.100 8765
Connection received on 192.168.111.100 1234
PacketCord.io Tunneled Hello!!!
The PacketCord.io Tunneled Hello!!! string has been successfully delivered over the UDP pseudo tunnel.
Terminate
Use the Destroy button to terminate the emulation.